Canva is available on the web via this link, and it can be downloaded as an app for Android and for iPhone. It can be used for free and it has a library of templates, images, and elements you can include in your creations. For this guide, we will use the web browser version for the screenshots. However, there’s no difference when it comes to the options each version has, all it changes is the positioning of the icons and the tools. Do you want to learn how to use Canva? Well, check out some of the most important tips that you probably aren’t aware of, but will make your life much easier!
1. How to use the advanced search
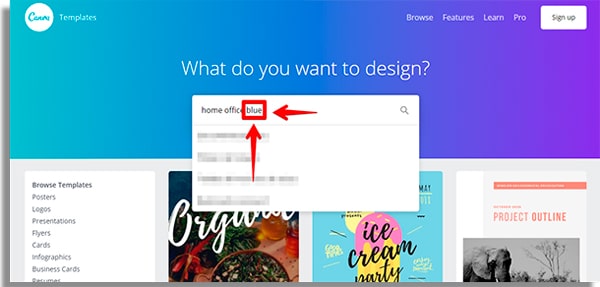
Sometimes, the searches on Canva will end up showing only the templates that are available only for the Pro or Premium subscribers, which can be frustrating. On the other hand, you can search more accurately, and so find the perfect image for your post much more easily. To do so, follow this link to find the templates page for Canve. Unlike the access from the home screen, on this link you’ll have access to a huge list with a lot of image templates, including infographics, CD covers, and wallpapers for Windows 10 and phones. Now, you can filter this search before even hitting Enter. After choosing your keyword, you can add a color to the search! On the screenshot down below you’ll see we’ve chosen templates for home office. We want it to be blue, so we simply add the word blue to the search.
It doesn’t end there! As we mentioned previously, Canva has a huge and varied number of templates that can be good for many different purposes. Imagine we want to create a slide show about home office work, but still keeping the template blue. When searching, simply add the word slide by the side of home office blue. See in the screenshot how it looks:
Check the results!
When you add these terms, your search becomes more precise and you’ll be able to find the correct image type to better create it on Canva!
2. How to make a colored-border image
One of the best tips to make impact images to draw the attention of fellow users on social media is to add a colored border to a picture. The first step is to choose one of your photos or to take new pictures. Before choosing, consider putting aside images that have more “complex” backgrounds, or images with a lot of elements. We say that because the first step to have a picture with a colored border is to remove the original background. Now, follow this link to an specialized tool to remove image backgrounds easily! Tap Select Photo and hit send to upload it.
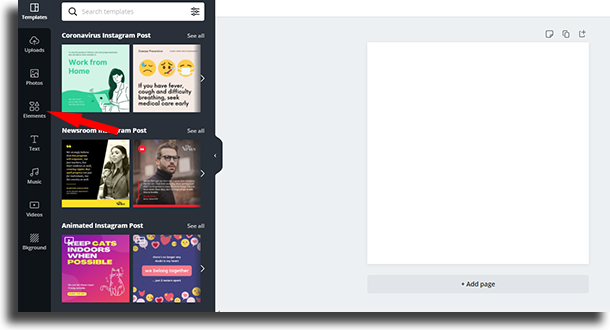
Just wait a few seconds and you will have an image with a transparent background by hitting the Download button. Now, follow this link and start learning how to use Canva to add a colored border to your images. Choose the image model you’ll create. For example purposes, we will choose the Instagram Post. However, keep in mind that any template will be fine. Choose Elements;
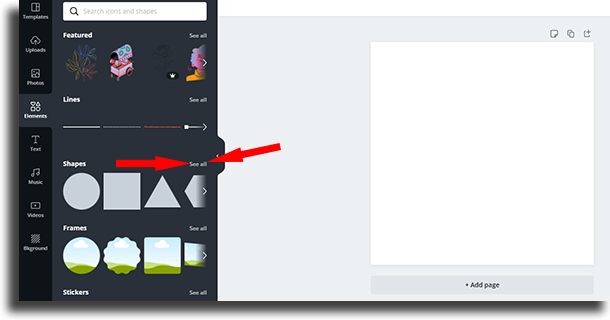
Click on See All in the Shapes option;
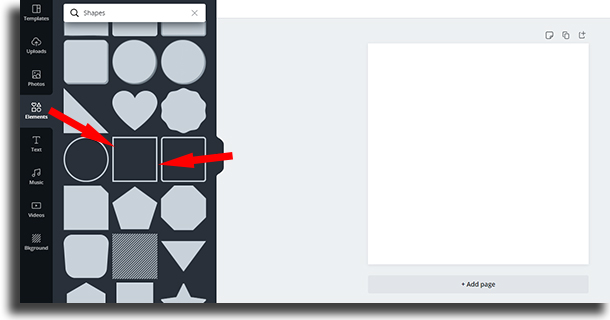
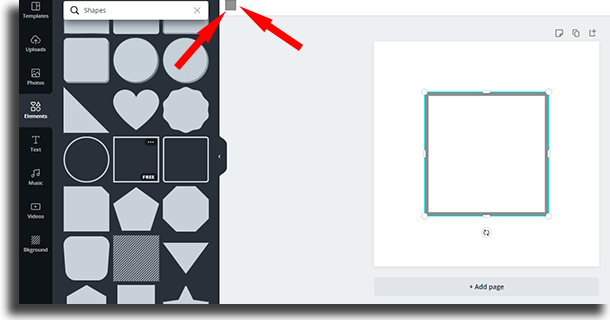
Choose a shape that has an empty square, as the example shows;
Click the small grey square to choose the color of your border;
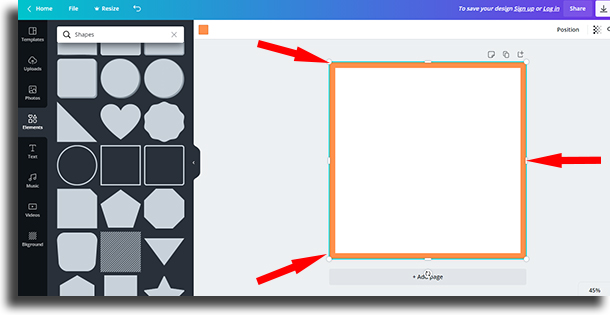
Select the color and, then, click and hold your cursor on a corner of the square. Drag it to the limit of the editing screen while holding the Alt key to make the square occupy the entire canvas;
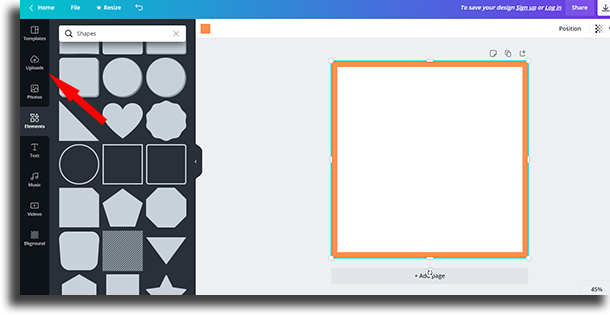
Now, upload your photo to Canva. Click on Uploads on the menu to the left of your screen;
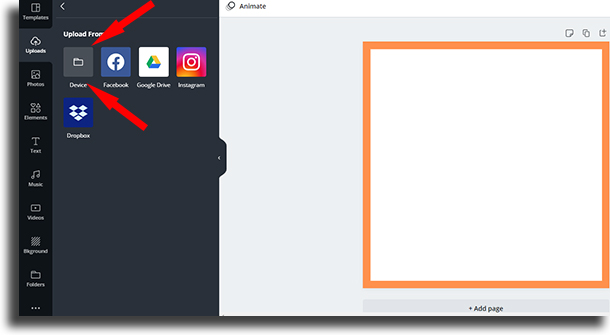
Click Upload media and choose Device, if it is stored locally;
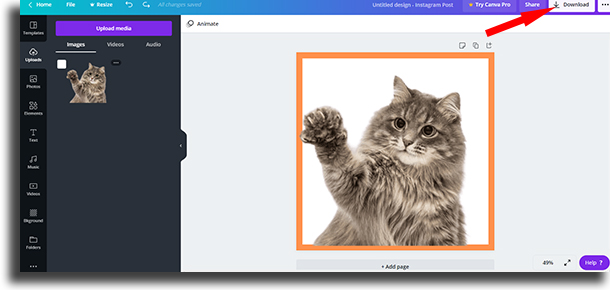
Select the image with a transparent background you’d created previously. Now, just adjust it to the square to finish the process of creating a picture witha colored border. Include whatever other elements you want and hit Download;
Tip: You can use the same steps to create a round profile photo on Instagram!
3. How to use Canva to mix colors
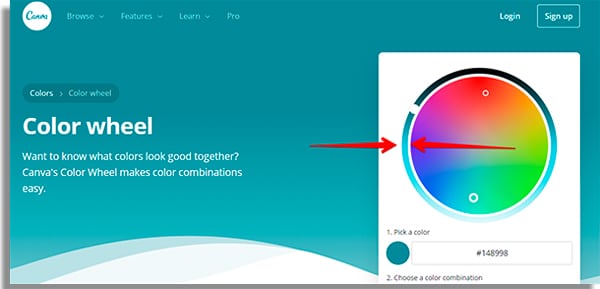
The color wheel tool in Canva is one of the least known ones. Even many old-time users of Canva don’t know about it! If you want to mix colors in the app, just follow these steps: 1 — Follow this link to go to the Color Wheel; 2 — The first wheel to take in consideration is the external one, just outside the circle. Here, you can chosoe the level of brightness for the colors;
3 — In the center wheel, you can make your colors more vibrant or more pastel. The closest to the center, the more pastel they will be;
Now, see a bit more about the options in the menu just under the color wheel:
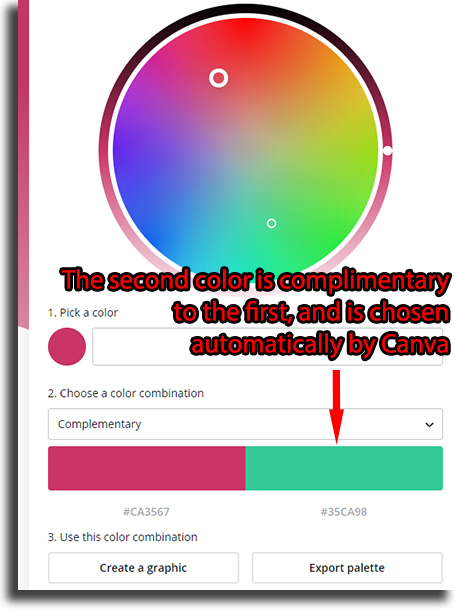
Pick a color: here you can choose the hex code for the color you wish to mix in the color wheel. 2. Choose a color combination: a more advanced feature that’s well explained in Canva’s own website. In the Complimentary option, for instance, the second color is directly contrasting to it.
Create a graphic / Export palette: this option is split in two. In the first, Canva will open the templates menu, with a lot of templates in this color scheme; The second lets you export this palette as a PDF file. In this file, you will see the tonalities you’ve chosen and their respective hex codes. Even though it is not that accessible for those still learning how to make images, the mixing of colors in Canva makes it an amazing tool for designers!
Did you like our guide on how to use Canva?
Let us know in the comments your opinion about the tips e’ve given you, and don’t forget to also check out the best PC software and the best free Android apps!
